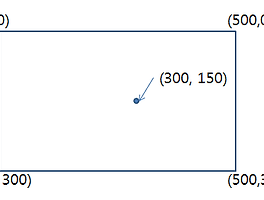
Grid : 테이블 형식으로 콘텐트를 구성하여 배치 할 수 있도록 하는 Layout Panel.
테이블 형식의 콘텐트를 구성하기 위한 Grid 설정하기
Grid에는 RowDefinitions와 ColumnDefinitions 두 가지 컬렉션 property가 있다. 두 property는 각각 행과 열을 관리하는 컬렉션이다. 원하는 행,열 만큼 각각의 컬렉션에 RowDefisnition과 ColumnDefinition을 추가하여 설정한다.
예를 들어, 3x3 (행,열)의 테이블 형식으로 Grid 를 구성하려 한다면,
물론, XMAL 뿐 아니라 런타임에도 행과 열을 추가 삭제 할 수 있다.
위 코드를 실행하면, 3x3 (행,열)로 구성 된 Grid가 4x2 (행,열)로 변경 되는 것을 확인 할 수 있다.

Grid에는 ShowGridLines 라는 Boolean 형태의 property가 있다. ShowGirdLines 속성을 True, False로 변경 하면, Grid가 구성 된 행과 열을 보여주거나 감출 수 있다. (XAML, 런타임 모두 가능)
콘텐트 엘리먼트의 배치
Grid 에는 Row, Column, RowSpan, ColumnSpan 네 가지의 Attached Property가 있어, 이것들을 사용하여 콘텐트 엘리먼트들을 배치할 수 있다.
Grid.Row와 Grid.Column 값으로 위치 될 행과 열을 지정하고,
Grid.RowSpan 으로 행의 확장을, Grid.ColumnSpan으로 열의 확장을 지정할 수 있다.
위 코드를 실행하면 다음과 같이 콘텐트 엘리먼트들이 배치 된 것을 확인 할 수 있다.

셀 크기 변경
RowDefinition과 ColumnDefinition을 추가 할 때, 각각 행의 높이, 열의 너비를 지정 할 수 있다.
셀 크기 변경에는 고정 값을 지정하는 방법과, * 을 이용하는 방법, Auto 를 이용하여 자종 크기를 지정하는 3가지 방법이 있다.
*을 이용하여 지정하는 경우에는 다른 지정방법에 의해서 사용되고 남은 공간이 얼마나 있는지를 계산 한 뒤, 그 결과에 따라서 결정된다. 위 경우에는 50을 지정하고 남은 공간을 5등분 하여, 두번째 Row는 2/5만큼, 세번째 Row는 3/5만큼의 크기로 결정된다.

Grid의 Height가 200이라면, 첫 번째 Row의 Height는 50, 두 번째 Row의 Height는 60, 세 번째는 90이 된다.

위 코드를 실행 한 결과, 첫 번째 Column은 콘텐츠 엘리먼트의 Width 값인 50만큼, 두 번째는 150, 세 번째는 200만큼의 사이즈가 지정 됐다.
GridSplitter를 사용하여, 동적으로 셀의 경계를 조절
System.Windows.Control.dll 어셈블리에는 실버라이트가 제공하는 내장 컨트롤을 보완하기 위한 여러가지 컨트롤이 있다. GridSplitter도 그 중 하나이며, System.Windows.Control 어셈블리 내 컨트롤을 사용하기 위해서는 우선 참조를 추가하고, XAML 상단에 네임스페이스를 참조하기 위한 접두사를 사용해야 한다.

테이블 형식의 콘텐트를 구성하기 위한 Grid 설정하기
Grid에는 RowDefinitions와 ColumnDefinitions 두 가지 컬렉션 property가 있다. 두 property는 각각 행과 열을 관리하는 컬렉션이다. 원하는 행,열 만큼 각각의 컬렉션에 RowDefisnition과 ColumnDefinition을 추가하여 설정한다.
예를 들어, 3x3 (행,열)의 테이블 형식으로 Grid 를 구성하려 한다면,
<Grid x:Name="myGrid" Grid.Row="2" ShowGridLines="True">
위와 같이 RowDefinitions에 RowDefinition을 3개, ColumnDefinitions에 ColumnDefinition을 3개씩 추가하면 된다.<Grid.RowDefinitions>
<RowDefinition/>
<RowDefinition/>
<RowDefinition/>
</Grid.RowDefinitions>
<Grid.ColumnDefinitions>
<ColumnDefinition/>
<ColumnDefinition/>
<ColumnDefinition/>
</Grid.ColumnDefinitions>
</Grid>
<RowDefinition/>
<RowDefinition/>
</Grid.RowDefinitions>
<Grid.ColumnDefinitions>
<ColumnDefinition/>
<ColumnDefinition/>
<ColumnDefinition/>
</Grid.ColumnDefinitions>
</Grid>
물론, XMAL 뿐 아니라 런타임에도 행과 열을 추가 삭제 할 수 있다.
this.myGrid.ShowGridLines = true;
this.myGrid.RowDefinitions.Add(new RowDefinition());
this.myGrid.ColumnDefinitions.RemoveAt(0);
this.myGrid.RowDefinitions.Add(new RowDefinition());
this.myGrid.ColumnDefinitions.RemoveAt(0);
위 코드를 실행하면, 3x3 (행,열)로 구성 된 Grid가 4x2 (행,열)로 변경 되는 것을 확인 할 수 있다.

Grid에는 ShowGridLines 라는 Boolean 형태의 property가 있다. ShowGirdLines 속성을 True, False로 변경 하면, Grid가 구성 된 행과 열을 보여주거나 감출 수 있다. (XAML, 런타임 모두 가능)
콘텐트 엘리먼트의 배치
Grid 에는 Row, Column, RowSpan, ColumnSpan 네 가지의 Attached Property가 있어, 이것들을 사용하여 콘텐트 엘리먼트들을 배치할 수 있다.
<Rectangle Width="Auto" Height="Auto" Fill="Blue"
Grid.Row="0" Grid.Column="0"/>
<Rectangle Width="Auto" Height="Auto" Fill="Yellow"
Grid.Row="1" Grid.Column="1"/>
<Rectangle Width="Auto" Height="Auto" Fill="Red"
Grid.Row="0" Grid.Column="1" Grid.ColumnSpan="2"/>
<Rectangle Width="Auto" Height="Auto" Fill="Green"
Grid.Row="1" Grid.Column="3" Grid.RowSpan="2"/>
3x3 (행,열)로 구성 된 Grid에 위와 같이 콘텐트 엘리먼트들을 추가 할 수 있다.Grid.Row="0" Grid.Column="0"/>
<Rectangle Width="Auto" Height="Auto" Fill="Yellow"
Grid.Row="1" Grid.Column="1"/>
<Rectangle Width="Auto" Height="Auto" Fill="Red"
Grid.Row="0" Grid.Column="1" Grid.ColumnSpan="2"/>
<Rectangle Width="Auto" Height="Auto" Fill="Green"
Grid.Row="1" Grid.Column="3" Grid.RowSpan="2"/>
Grid.Row와 Grid.Column 값으로 위치 될 행과 열을 지정하고,
Grid.RowSpan 으로 행의 확장을, Grid.ColumnSpan으로 열의 확장을 지정할 수 있다.
위 코드를 실행하면 다음과 같이 콘텐트 엘리먼트들이 배치 된 것을 확인 할 수 있다.

셀 크기 변경
RowDefinition과 ColumnDefinition을 추가 할 때, 각각 행의 높이, 열의 너비를 지정 할 수 있다.
셀 크기 변경에는 고정 값을 지정하는 방법과, * 을 이용하는 방법, Auto 를 이용하여 자종 크기를 지정하는 3가지 방법이 있다.
<Grid.RowDefinitions>
<RowDefinition Height="50"/> 고정 값을 지정하는 방법
<RowDefinition Height="2*"/> *을 이용하는 방법 (50을 제외한 부분의 2/5)
<RowDefinition Height="3*"/> *을 이용하는 방법 (50을 제외한 부분의 3/5)
</Grid.RowDefinitions>
고정 값을 지정 하는 경우 Row의 Height나 Column의 Width가 지정 된 픽셀만큼으로 지정된다.<RowDefinition Height="50"/> 고정 값을 지정하는 방법
<RowDefinition Height="2*"/> *을 이용하는 방법 (50을 제외한 부분의 2/5)
<RowDefinition Height="3*"/> *을 이용하는 방법 (50을 제외한 부분의 3/5)
</Grid.RowDefinitions>
*을 이용하여 지정하는 경우에는 다른 지정방법에 의해서 사용되고 남은 공간이 얼마나 있는지를 계산 한 뒤, 그 결과에 따라서 결정된다. 위 경우에는 50을 지정하고 남은 공간을 5등분 하여, 두번째 Row는 2/5만큼, 세번째 Row는 3/5만큼의 크기로 결정된다.

Grid의 Height가 200이라면, 첫 번째 Row의 Height는 50, 두 번째 Row의 Height는 60, 세 번째는 90이 된다.
<Grid.ColumnDefinitions>
<ColumnDefinition Width="Auto"/>
<ColumnDefinition Width="Auto"/>
<ColumnDefinition Width="Auto"/>
</Grid.ColumnDefinitions>
<Rectangle Width="50" Fill="Blue" Grid.Column="0"/>
<Rectangle Width="150" Fill="Yellow" Grid.Column="1"/>
<Rectangle Width="200" Fill="Red" Grid.Column="2"/>
또 한가지, Auto를 사용하게 되면, 해당하는 Row나 Column에 배치되는 콘텐트 엘리먼트의 사이즈(Width나 Height)에 따라서 자동으로 Row나 Column의 사이즈가 지정 된다.<ColumnDefinition Width="Auto"/>
<ColumnDefinition Width="Auto"/>
<ColumnDefinition Width="Auto"/>
</Grid.ColumnDefinitions>
<Rectangle Width="50" Fill="Blue" Grid.Column="0"/>
<Rectangle Width="150" Fill="Yellow" Grid.Column="1"/>
<Rectangle Width="200" Fill="Red" Grid.Column="2"/>

위 코드를 실행 한 결과, 첫 번째 Column은 콘텐츠 엘리먼트의 Width 값인 50만큼, 두 번째는 150, 세 번째는 200만큼의 사이즈가 지정 됐다.
GridSplitter를 사용하여, 동적으로 셀의 경계를 조절
System.Windows.Control.dll 어셈블리에는 실버라이트가 제공하는 내장 컨트롤을 보완하기 위한 여러가지 컨트롤이 있다. GridSplitter도 그 중 하나이며, System.Windows.Control 어셈블리 내 컨트롤을 사용하기 위해서는 우선 참조를 추가하고, XAML 상단에 네임스페이스를 참조하기 위한 접두사를 사용해야 한다.
xmlns:controls="clr-namespace:System.Windows.Controls;assembly=System.Windows.Controls"
그리고 동적으로 셀 크기를 변경하고자 하는 위치에 GridSplitter를 배치한 뒤 실행 하면 된다.<Grid.ColumnDefinitions>
<ColumnDefinition Width="*"/>
<ColumnDefinition Width="*"/>
<ColumnDefinition Width="*"/>
</Grid.ColumnDefinitions>
<Rectangle Width="Auto" Fill="Blue" Grid.Column="0"/>
<Rectangle Width="Auto" Fill="Yellow" Grid.Column="1"/>
<Rectangle Width="Auto" Fill="Red" Grid.Column="2"/>
<controls:GridSplitter Width="5" Grid.Column="1"/>
런타임시 GridSplitter를 Mouse로 Drag하면 셀 크기가 동적으로 변경 되는 것을 확인 할 수 있다.<ColumnDefinition Width="*"/>
<ColumnDefinition Width="*"/>
<ColumnDefinition Width="*"/>
</Grid.ColumnDefinitions>
<Rectangle Width="Auto" Fill="Blue" Grid.Column="0"/>
<Rectangle Width="Auto" Fill="Yellow" Grid.Column="1"/>
<Rectangle Width="Auto" Fill="Red" Grid.Column="2"/>
<controls:GridSplitter Width="5" Grid.Column="1"/>

'silverlight' 카테고리의 다른 글
| Style 정의하기 (0) | 2009.06.16 |
|---|---|
| VisualStateManager (0) | 2009.06.15 |
| Storyboard (Animation in Silverlight) (0) | 2009.06.15 |
| Layout Panel #5 (WrapPanel) (0) | 2009.06.12 |
| Layout Panel #4 (DockPanel) (0) | 2009.06.12 |
| Layout Panel #3 (StackPanel) (0) | 2009.06.12 |
| Layout Panel #1 (Canvas) (0) | 2009.06.11 |
| Coposition에서의 ViewPort, AspectRatio, 좌표계, ElementalPoint, LogicalPoint (0) | 2009.06.10 |
| Deepzoom Composer로 Export 된 결과물 (0) | 2009.06.09 |
| Deepzoom (0) | 2009.06.09 |


